- Install MongoDB
- Configure MongoDB
- Conclusion
- Install MongoDB
- Configure MongoDB
- Conclusion
Install MongoDB on Ubuntu 16.04
Step 1 - Importing the Public Key
GPG keys of the software distributor are required by the Ubuntu package manager apt (Advanced Package Tool) to ensure package consistency and authenticity. Run this command to import MongoDB keys to your server.
sudo apt-key adv --keyserver hkp://keyserver.ubuntu.com:80 --recv EA312927
Step 2 - Create source list file MongoDB
Create a MongoDB list file in /etc/apt/sources.list.d/ with this command:
echo "deb http://repo.mongodb.org/apt/ubuntu "$(lsb_release -sc)"/mongodb-org/3.2 multiverse" | sudo tee /etc/apt/sources.list.d/mongodb-org-3.2.list
Step 3 - Update the repository
update the repository with the apt command:
sudo apt-get update
Step 4 - Install MongoDB
Now you can install MongoDB by typing this command:
sudo apt-get install -y mongodb-org
We have to create a new mongodb systemd service file in the '/lib/systemd/system' directory. Go to that directory and create the new mongodb service file 'mongod.service' with vim.
cd /lib/systemd/system/
vim mongod.service
vim mongod.service
Now update the systemd service with command below:
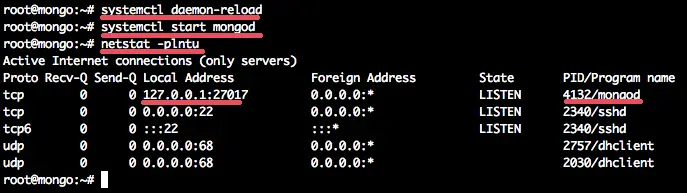
systemctl daemon-reload
Start mongodb and add it as service to be started at boot time:
systemctl start mongod
systemctl enable mongod
Now check that mongodb has been started on port 27017 with the netstat command.systemctl enable mongod
netstat -plntu
Configure MongoDB username and password
When the MongoDB packages are installed you can configure username and password for the database server:Step 1 - Open mongo shell
Before you set up a username and password for MongoDB, you need to open the mongodb shell on your server. You can login by typing:
mongo
If you get error Failed global initialization: BadValue Invalid or no user locale set. Please ensure LANG and/or LC_* environment variables are set correctly, try the command:
export LC_ALL=C
mongo
mongo
Step 2 - Switch to the database admin
Once you`re in the MongoDB shell, switch to the database named admin:
use admin
Step 3 - Create the root user
Create the root user with this command :
db.createUser({user:"admin", pwd:"admin123", roles:[{role:"root", db:"admin"}]})
Desc: Create user admin with password admin123 and have the permission/role as root and the database is admin.
Now type exit to exit from MongoDB shell.
Step 4 - Enable mongodb authentication
Edit the mongodb service file '/lib/systemd/system/mongod.service' with your editor.
vim /lib/systemd/system/mongod.service
On the 'ExecStart' line 9, add the new option '--auth'.
ExecStart=/usr/bin/mongod --quiet --auth --config /etc/mongod.conf
Save and exit.Reload the systemd service:
systemd daemon-reload
Step 5 - Restart MongoDB and try to connect
Now restart MongoDB and connect with the user created.
sudo service mongod restart
and connect to the mongodb shell with this command:
mongo -u admin -p admin123 --authenticationDatabase admin
and you will see the output like this: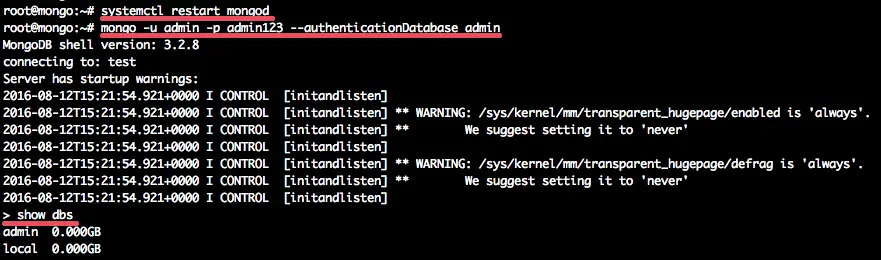
Comments
Post a Comment